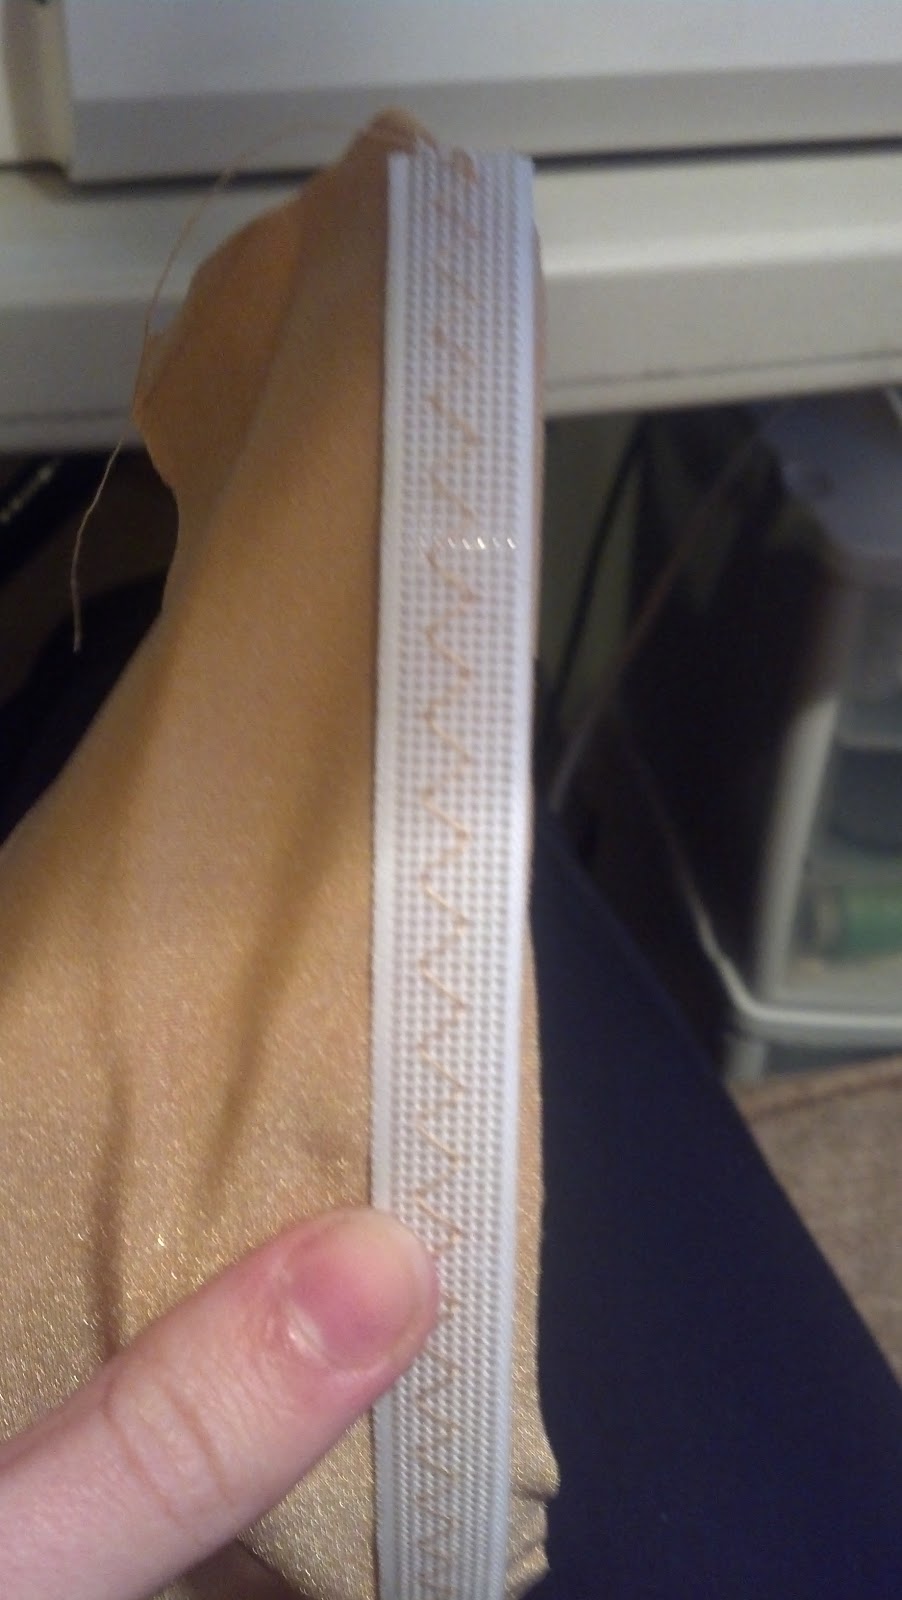
I start with rigilene boning and a piece of lycra. The rigilene should be about an inch longer than the final circumference you want the bangle to be, and I cut my lycra about an inch longer than that so I have excess at the ends. I cut mine to be about 10" long, if I am remembering correctly off the top of my head. I actually just take the piece of rigilene and make a loop and shove my hand through it, checking to make sure it can actually get over the widest part of my palm. If I'm making multiple I'll then use the first cut piece as my template for the others. I cut my piece of lycra about 3.5-4 times as wide as the piece of rigilene, so I've got wiggle room.
Step one: stitch that sucker. I align the lycra edge with the rigilene edge (as best as I can) so that the lycra right side is down (if your lycra does in fact have a discernible right side) and so that the curve of the rigilene is also facing down (so you're stitching this to the inside first.
I use a wide zig zag stitch on a long setting. The fewer times the needle must pierce the rigilene, the less chance of it bending and breaking! Use a heavy enough needle too as this stuff is THICK!
This picture shows the top side and the one below shows the underside. As you can see in the above picture, there's some overlap and rough edges. It happens, trim it down until you've got a nice lycra edge that is either flush with the rigilene or the rigilene slightly extends over it.
Fold over not once...
But twice until you've got two nice folded edges on both sides of the bracelet and you are again stitching with the inside of the bangle down.
Repeat the same stitching process as above. Here you will find that if you have more excess fabric, it is easier to pull it nice and snug in any places you need to. If your lycra is cut properly on the grain you will have less issues with the fabric buckling and getting bunching. Manage your fabric as it goes through the machine to get a nice surface.
Now that's a whole lotta excess fabric, so let's trim that down.
I also trimmed any excess off of the ends. I like to leave 1/4" - 3/8" on the ends to give the loop a little bit of a nicer finish rather than one really big blunt drop.
Loop! Overlap the ends until the circumference is the final desired circumference.
This is the toughest part. The loop is tiny and the machine foot likes to get in the way. Go. Slowly. I have bent/broken so many needles making these.
For this bracelet, I used a straight stitch in a slightly longer than normal length and went back and forth a couple times. Go slowly. I often now use a wide zig zag with a longer than normal stitch length to tack this part down because it gives less of a seam valley in the finished product. Either way, as you can see below, one attachment is not enough to keep the ends nice and snug.
I stitch it down about 1/2"-3/4" away, depending on how much excess length I have in the bracelet. Make sure both of these seams are going through both layers of rigilene or the rigilene can eventually start to poke through the lycra.
You can see in the picture below what I mean about the seam valleys. They'll be completely covered in rhinestones though, so if it doesn't bother you, don't worry about it.
I'm sorry I have been so delinquent in posting! I was good about taking pictures as I went, but have not been as good about posting them. I finished the aqua and lime dress, now affectionately referred to as either "the fish dress" or "the mermaid dress", back in October. It is my favorite to date and I am extremely pleased with the end result. I also recently sold the pink dress (yay!) and am in the process of doing some alterations for the new owner, including adding a bunch of crystal AB to the lace and making a new stoned belt to go with it.
So the mermaid dress:
I played around with some different ideas to embellish the top, rushed net
Ruffles. In retrospect now they look so overpowering and top heavy.
I then found an amazing embroidery tutorial from the woman who makes the Game of Thrones costumes. If you'd like to check it out, go to her website: http://www.michelecarragherembroidery.com/How-I-Create-an-Embroidery%282880144%29.htm
My designs don't even come close to hers in complexity and richness, but I was inspired to try out some new things, so I decided to make some fish to go on my dress, and hence, the mermaid/fish dress came to be.
I loved the way the fish turned out, and wanted to make more of them to put all over the dress, but they took about 4 hours each to make and therefore were not feasible.
The final step for them is coating the back in glue to keep the threads from pulling loose, and then gluing/stitching them on.
I played around with some more designs for the bodice, but ultimately decided on a striped, ruched net top and leaving the net sides bare.
I played around with some places to put the fish too, but with only two of them, I had a hard time deciding where to put them so that they wouldn't look out of place or too small.
Bodice stoning. I added a little bit of fringe to the front just to give it a little more something to draw the eye.
Experimenting with more stoning ideas, ultimately decided to leave the light blue stripes plain so that the green ones were more accented.
In progress shot with bust stoning done.
You can faintly see the fish there on my right shoulder blade, though they're a little small.
Here you can see what I ultimately did with the fish a little better. I decided to run with the fish motif and stone the bodice like it was scales.
One of my favorite books as a child was the rainbow fish. I drew inspiration from that and decided to fill in some of the scales with different colored rhinestones.
Pre float stoning, including the FOUR circle organza underskirt. I like the way the gif makes the sparkles more evident.
I am going to continue to fill in more of the scales as time permits, but I decided it was wearable at that point. I also stoned the float arm bands.
Necklace to go with, complete with shell shaped Swarovski pendant!
Posing at Ohio Star Ball with the preciosa motorcycle (wearing a different necklace).
So I have failed miserably at keeping track of the time spent on this dress. I was using an online stopwatch and the tab closed, resetting it. It was around 16 hours at that point and that was when I had just started sewing godets into the top skirt. I estimate that since then I've spent about 6 more hours putting the remainder of the godets in, making a pistachio chiffon underskirt with a fishing line hem, and now I am working on a turquoise organza underskirt. This one is going to be detachable so I can use it for another dress I've got in the planning stages. It will be crinoline trimmed and as of now, is at 4 full circles (though it starts low, around the knees. I'm trying to get that big fluff out at the bottom going).
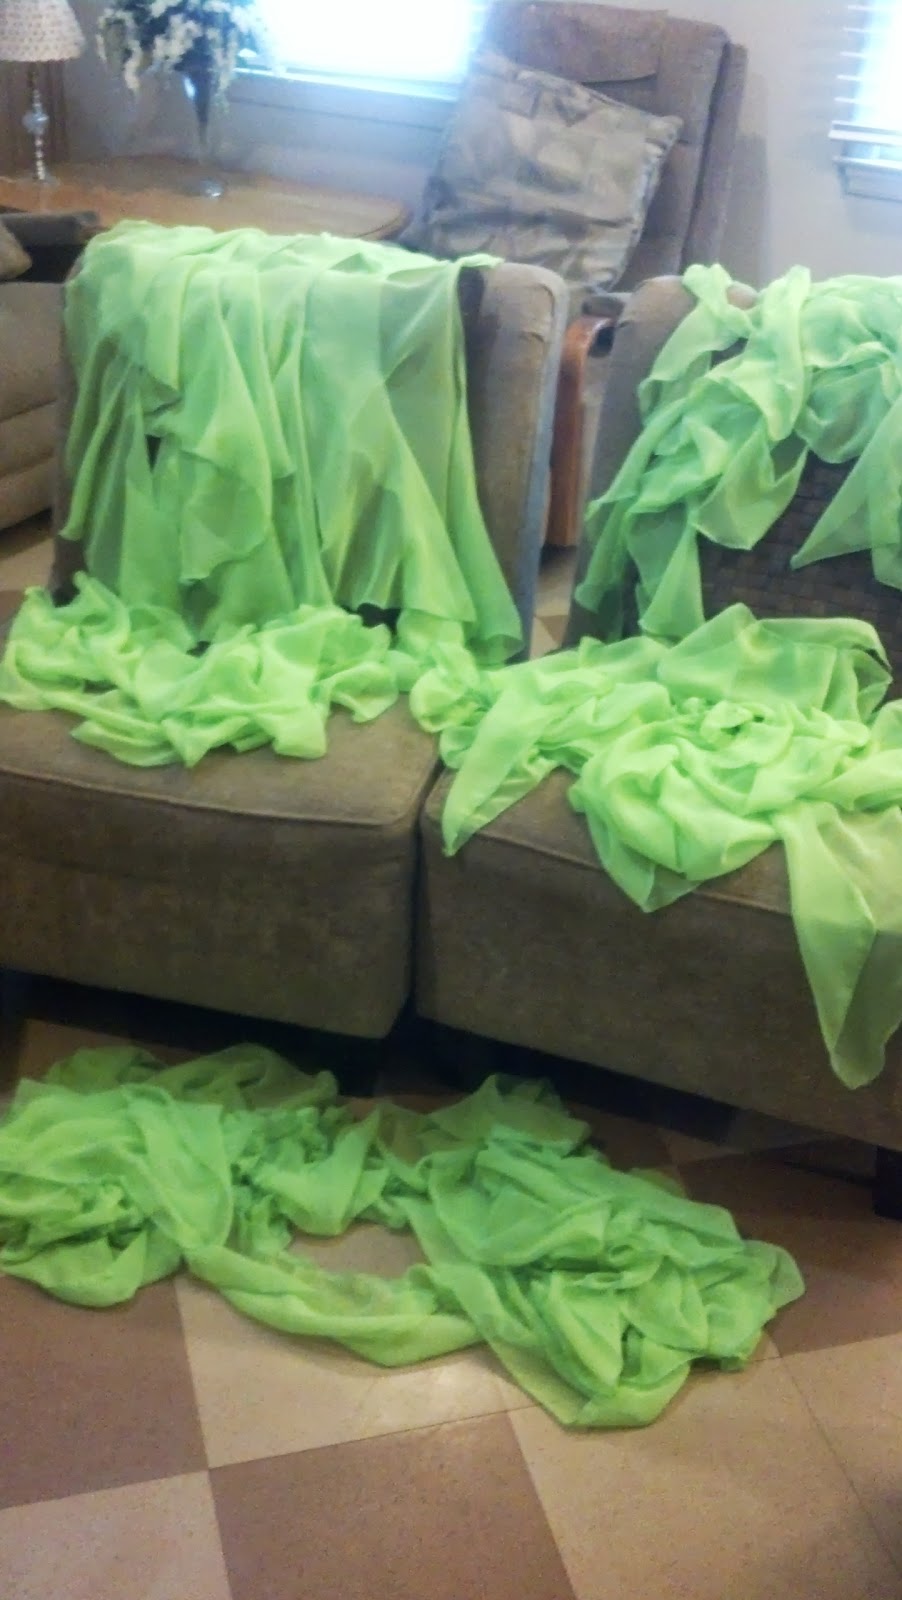
When I last left you guys I was just finishing pattern drafting. I have since made the bodice, bodysuit, and inserted the mesh side panels. I'm afraid I didn't get any pictures of that before I started inserting the skirt panels. The top skirt is made of 6 quarter circles with circular ruffles on the edges and a gathered ruffle at the bottom. There are a lot of ruffles, and for a while my sewing area looked like a green dress had just exploded everywhere:
This is all of the ruffles organized by type, there are 5 different kinds, small, medium, large, double length small, and giant gathered ruffle for the hem (see pile on floor).
The best way to make a super long (500 inches!) ruffle is to zigzag stitch over a heavier thread. Due to the length, I cut my heavy thread at a couple places so I could adjust individual sections more easily as I attach it to the rest of the skirt.
This is a single skirt panel with the 3 ruffles (small, medium, and large) basted to it. I was going to pleat the double length small ruffles and top stitch them to the one side of the panel, but I think that might be too much ruffle now that it's coming together.
Two panels inserted!
Here's the dress with the top skirt finished.
The first underskirt, chiffon with fishing line trim. 12 quarter circle panels
After stitching them together, I staystitched the top and pinned it to the back of a chair to let the bias settle out. Trimming these bits is much like giving a haircut, trim to the shortest bit and make it all even.
This was my first time doing a fishing line hem, not as hard as it might seem, but more difficult than crinoline. I used my serger with these tension settings:
Every once in a while the fabric will start to bunch, usually if I'm going too fast or holding the line too tightly.
Pushing the line through though will "inflate" these curls and get rid of the bunching. This is easier if you catch it sooner or you'll have a lot of fabric to try to move the line through.
I inserted the line between the needle and the blade. After it gets started, it pretty much takes care of itself, as long as it isn't getting too tangled. This is a case where a light touch makes it go so much better. Gently guiding the line rather than trying to push or pull it worked best. Moderate speed also gave the line enough time to get moved by the feed dogs at the same pace as the fabric.
When I had only 10 inches to go, I sliced through the line for the first time. Sad face.
Fixing it is no big deal though, I overlapped the new line with the old by a couple inches and just serged over it.
And here's the underskirt complete with fishing line! I like the curl the 40 lb line is giving to the chiffon.