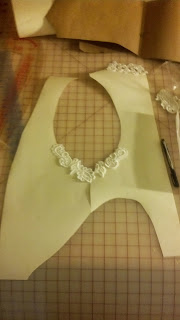
The title of this post was inspired by the fact that I never seem to know how much time it takes me to make things. I've always been terrible at estimating times, which often results in late nights frantically finishing homework, projects, commissions, etc. So I have decided that as I make this ballgown, I will be starting and stopping a stopwatch with each time I start or stop progress. This should also make me blog more regularly, since I can record the times in here in case the stopwatch website decides to eat them for some unknown reason (mainly, computers are evil). I can't include time thinking about the project, since I'd be starting and stopping the stopwatch all the time, but I will include the time spent patterning, drafting, tracing, cutting, sewing, embellishing, fitting, stoning, etc etc etc (blogging not included). I will preface each post/segment with the times spent and then underneath say what I did in that time. For some of you, this may show you just how much time I waste tearing things out, but the other seamstresses out there will understand.
So, ready, set, SEW!
(00:00:00-00:29:03)
Pattern drafting! This design is going to have some slight modifications to my basic pattern I used in my previous two dresses (Ariel and Aurora) most importantly, a mesh panel cut out of the side, similar to this dress:
This means redrafting the pattern to accomodate this slicing and drafting a new piece for the mesh insert. Enough talking about the design though, here's the sketch of the idea:
 |
| Front |
 |
| Back, showing floats |


Interesting concept. I haven't tried inserting a mesh panel in any of my dresses yet.
ReplyDelete